USE A PER KIT I 180572
SPECIAL CUTTING & CRIMPING
PER in plumbing is on the rise !
It is indeed an unalterable material, resistant to corrosion and not very sensitive to limestone, which withstands a temperature of 90 ° C at a pressure of 4 bars (the normal pressure of an installation is 3 bars).
It can be poured into a concrete slab once sheathed or slip behind plasterboard panels, to supply a bathroom or a kitchen with hot/cold water.
The PER is available as standard in 16 x 1.5, ie a 16mm diameter tube and 1.5mm thickness, corresponding to an internal diameter of 13mm.
It is sold as crowns up to 100 meters long. Only two diameters are needed for the water supply to the house: the 16 x 1.5 and the 12 x 1.1. There are no smaller dimensions. The largest diameters are used to feed the collectors (generally 20mm diameter).
The flexibility of PER allows pipes to be bent by hand without the need for a bender. But they immediately return to their original shape and therefore require accessories to guide them in curves and screed exits.
To install a PER circuit, you will need a PER kit case, including the necessary tools for cutting and connection.
>>> CLICK HERE TO WATCH THE VIDEO <<<
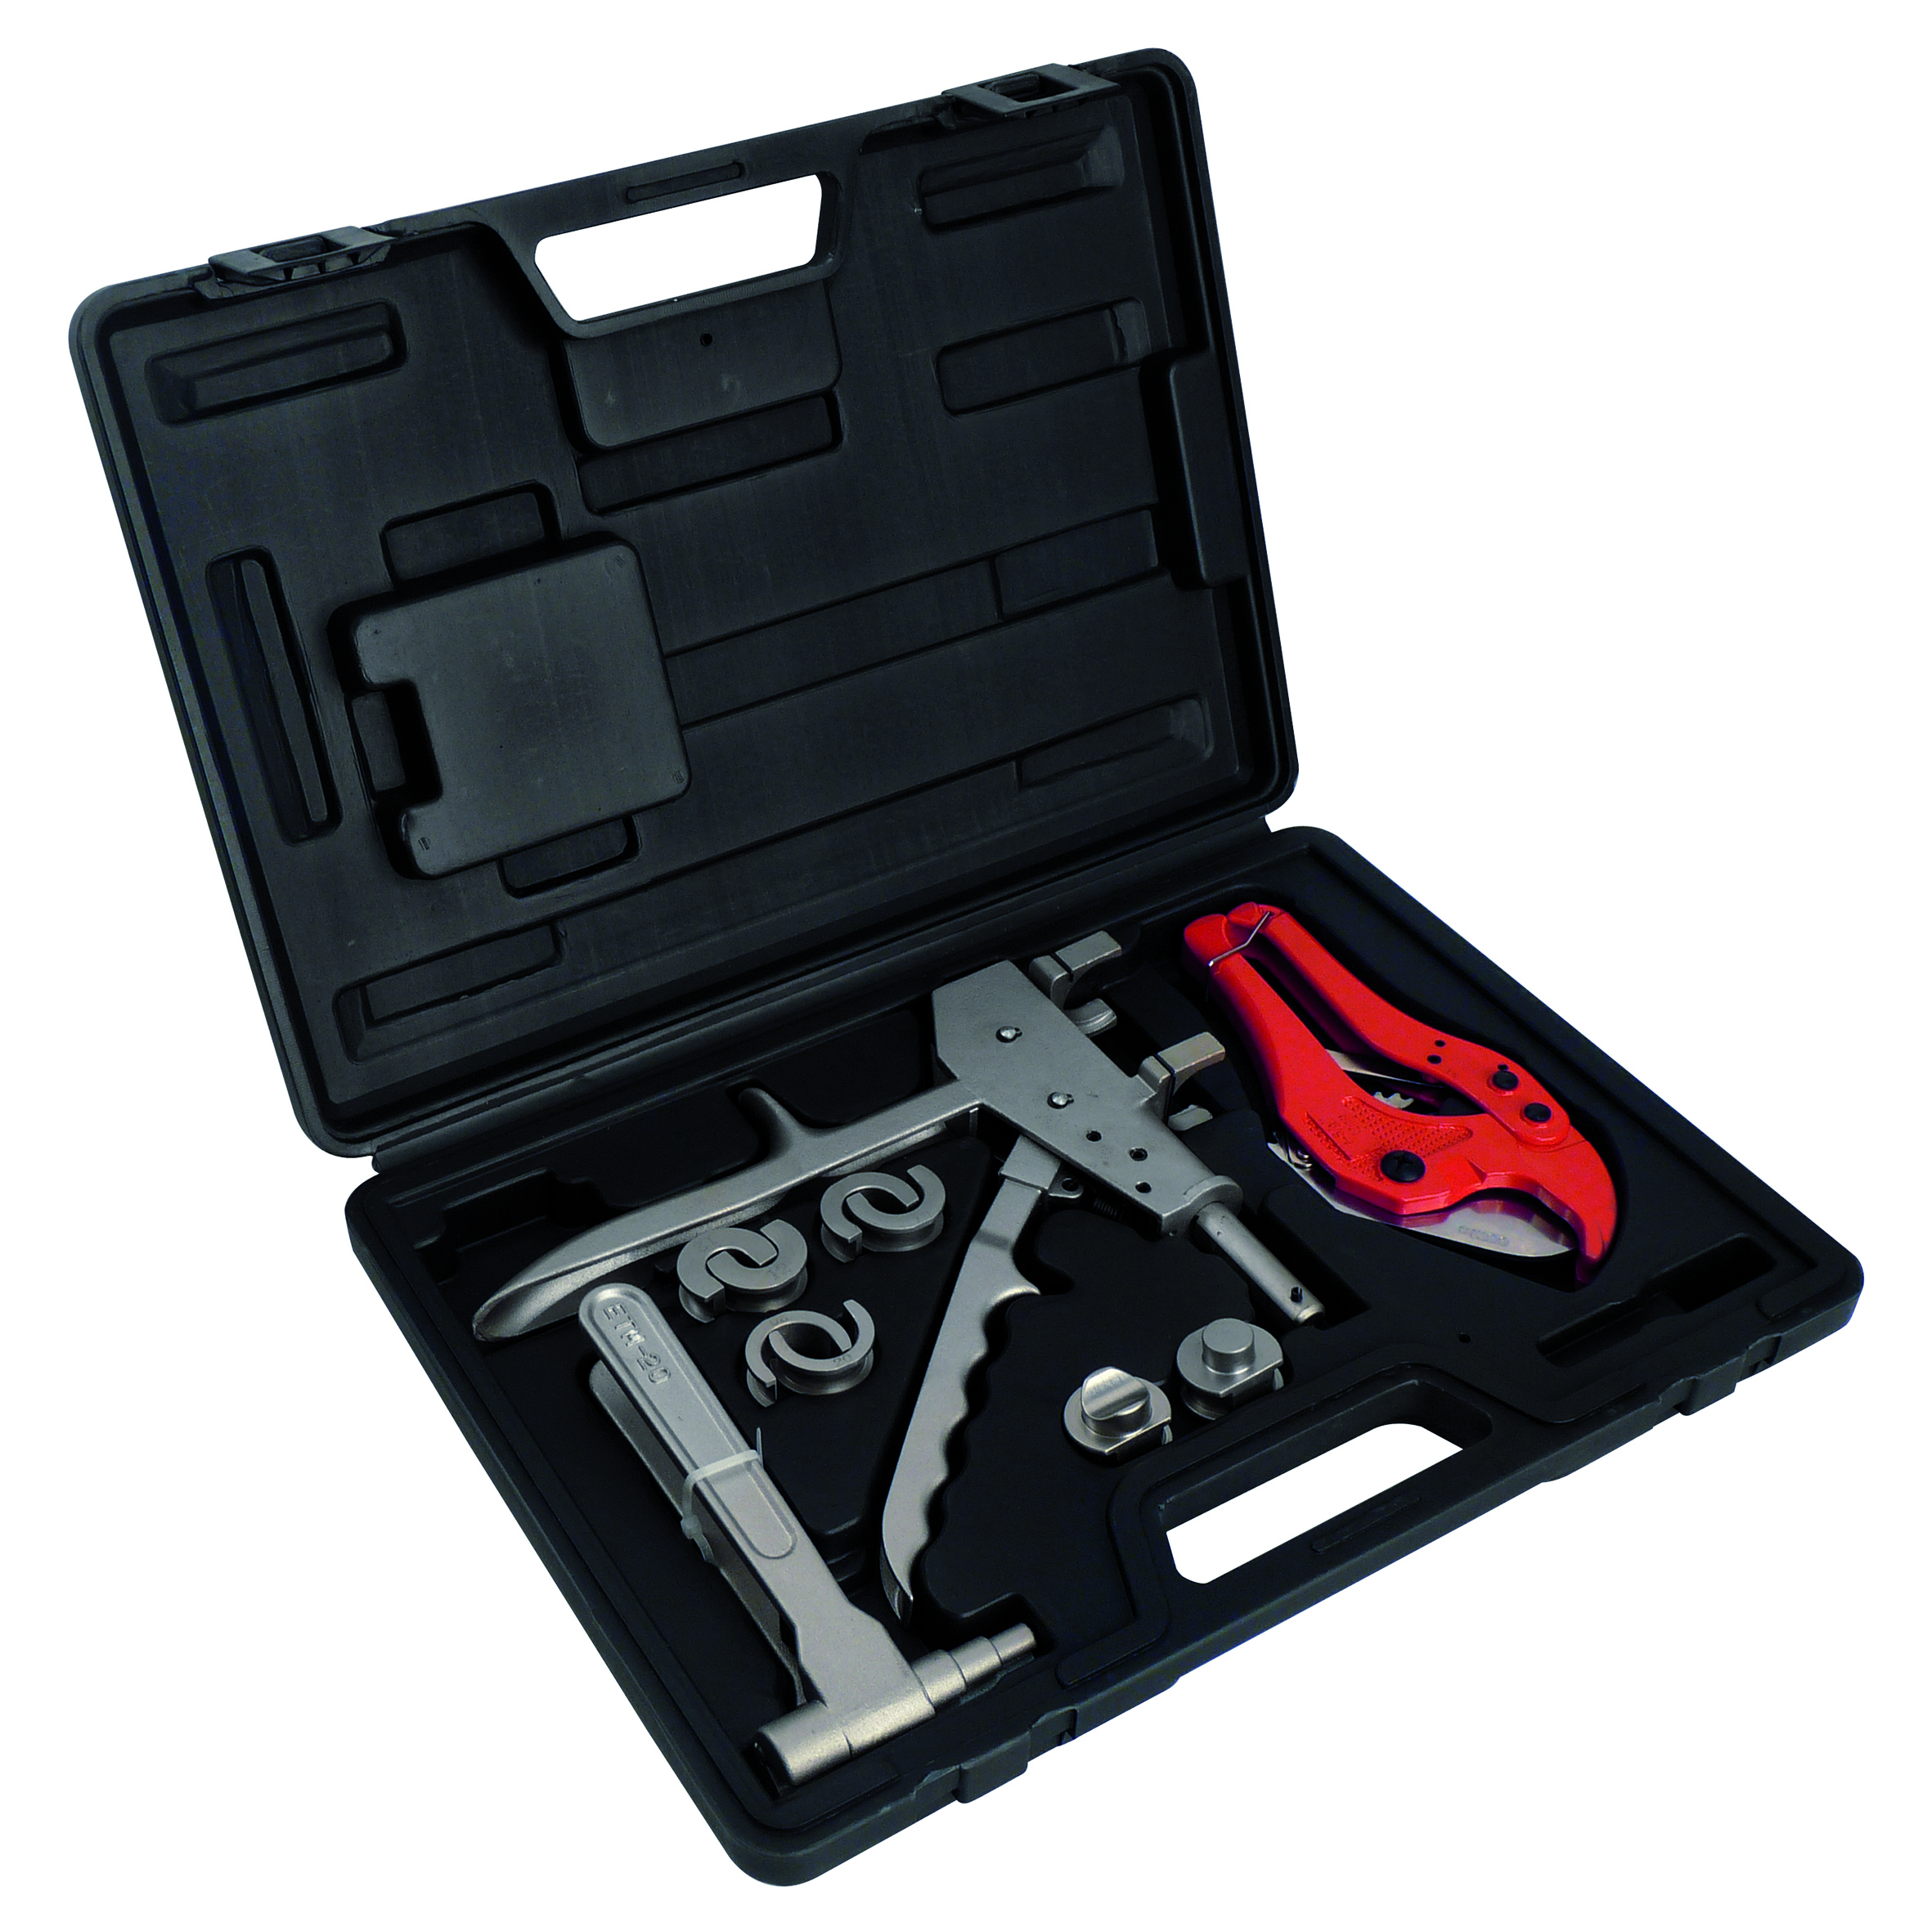
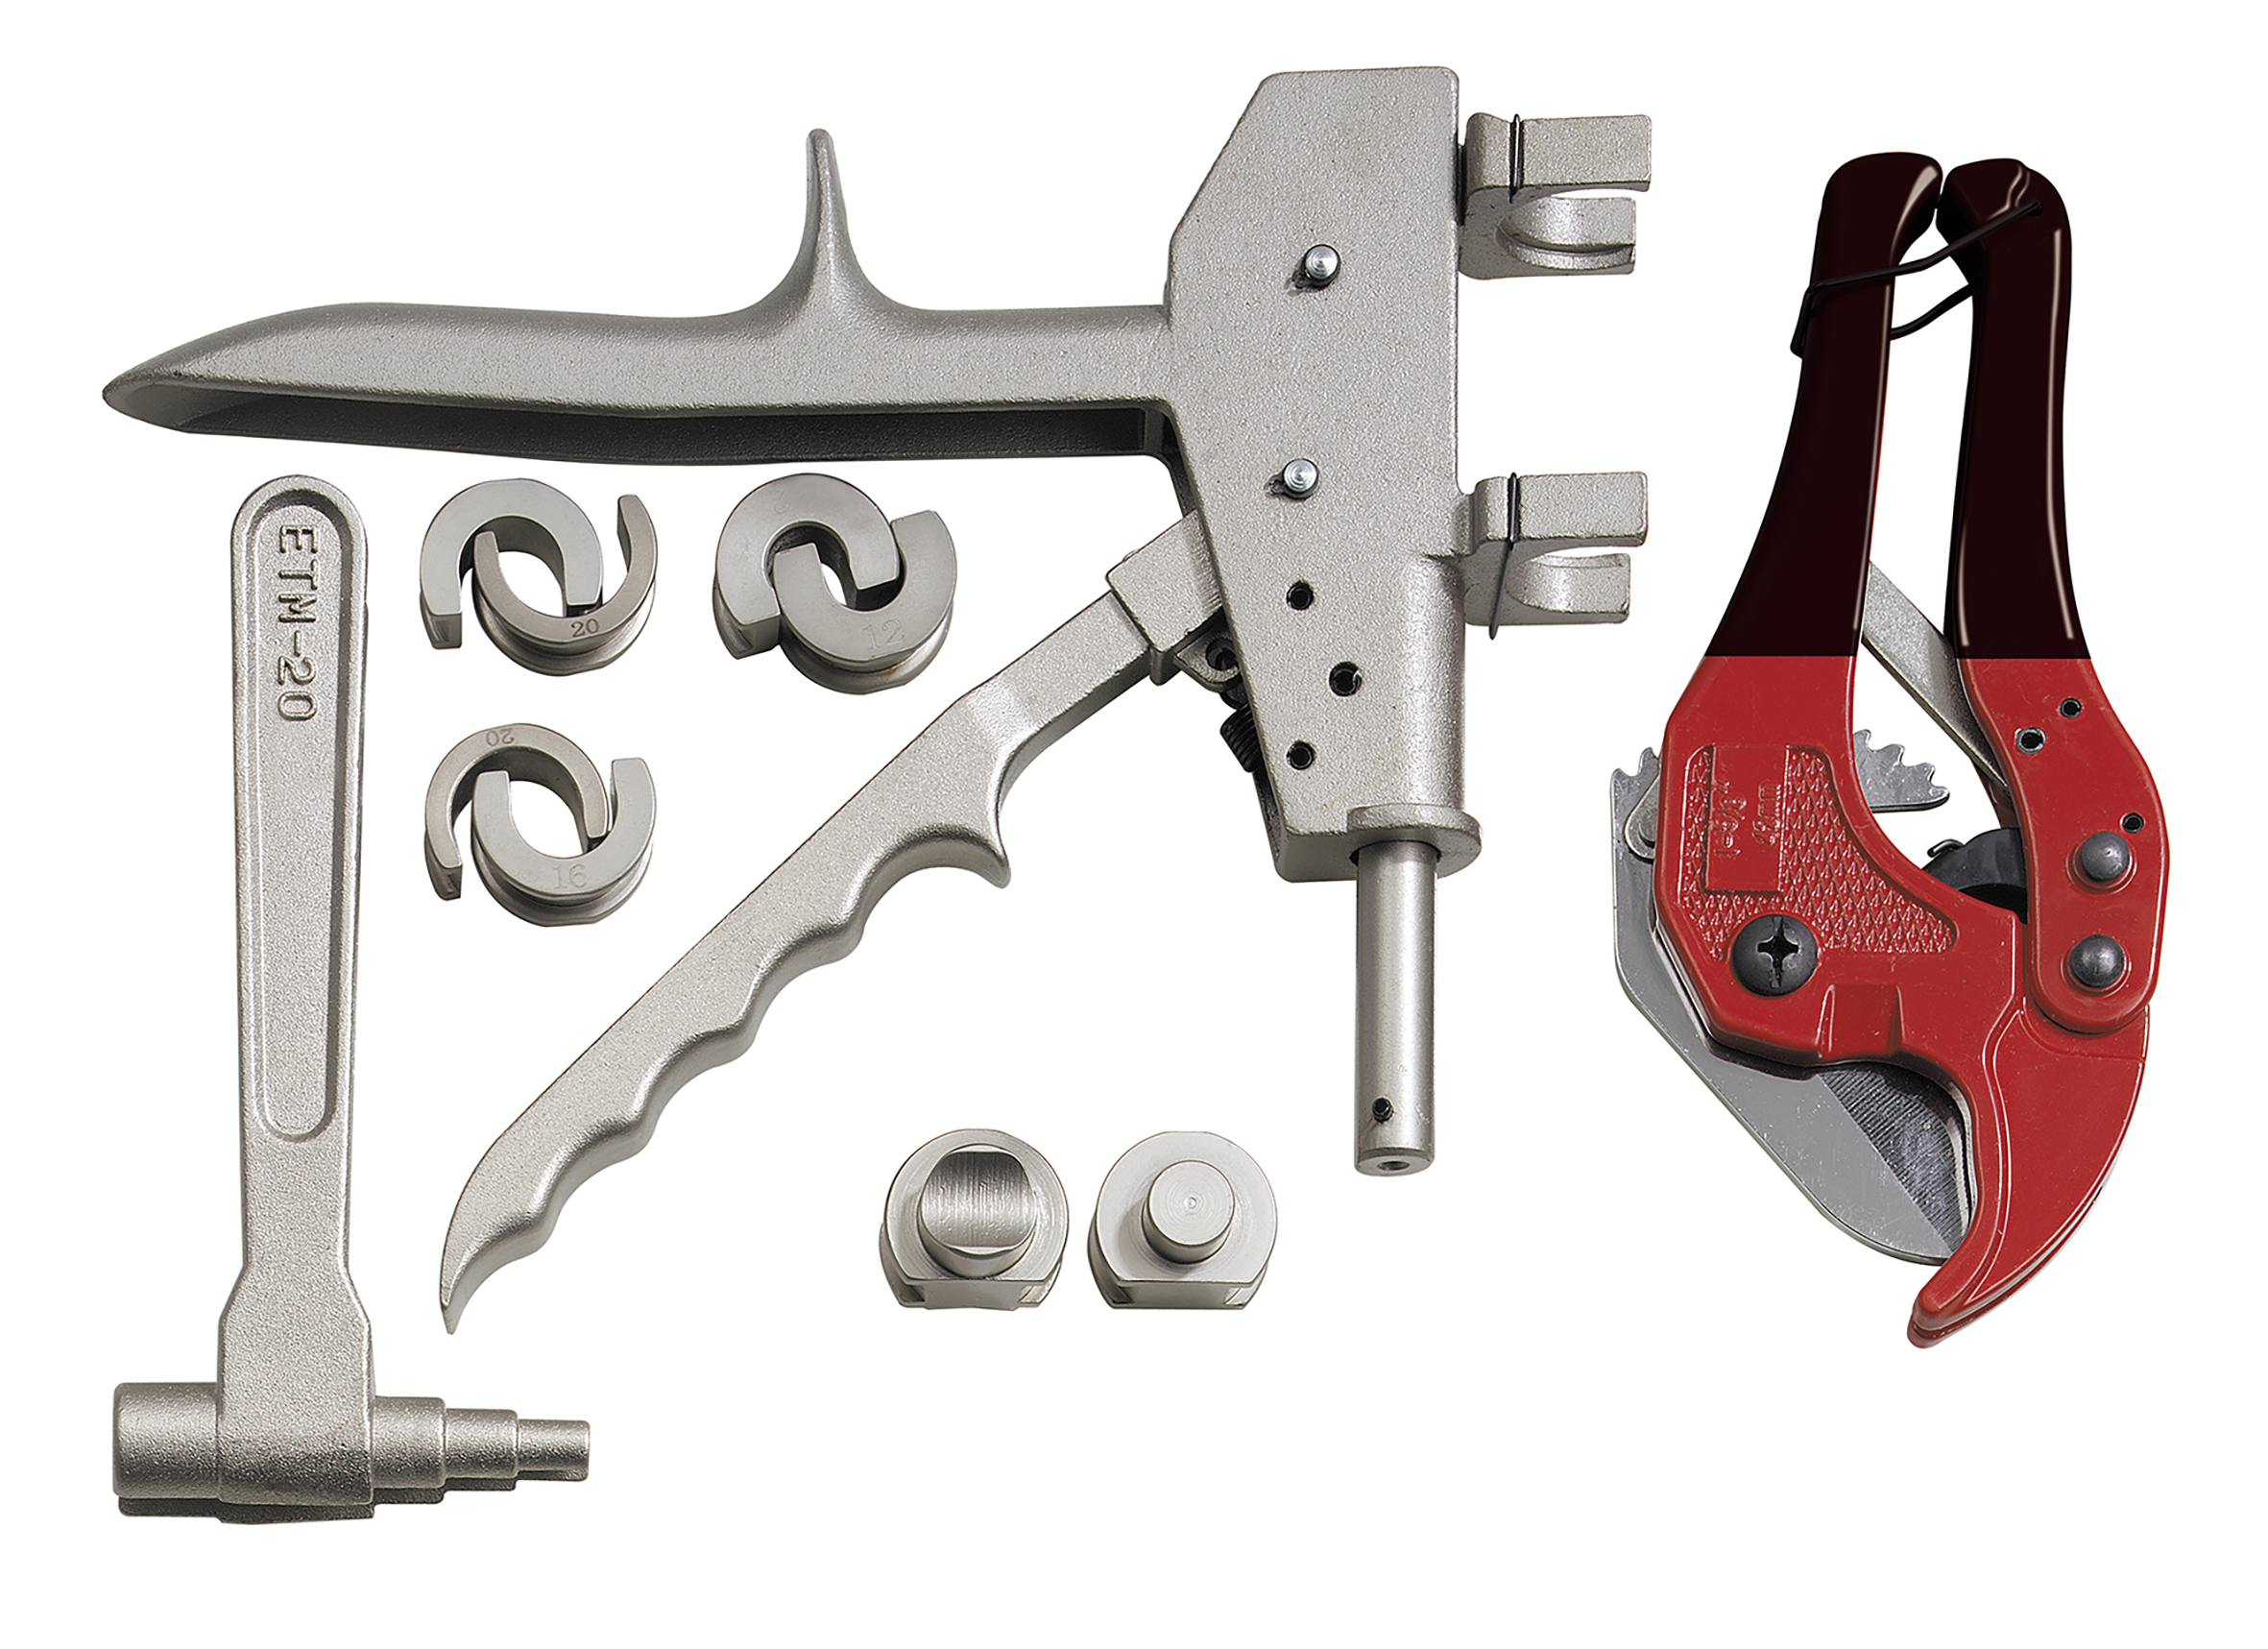
KIT CONTENTS :
A - Cutting grip : PVC-PER-PEX, Ø max 42 mm
B - Pipe expander
C - Clip of slip crimp : 20x25 mm
D - Adaptators : Ø 10x12, 13x16, 16x20 mm
E - Bumper for elbow fitting, M/F
F - Bumper for right or T fitting, M/F
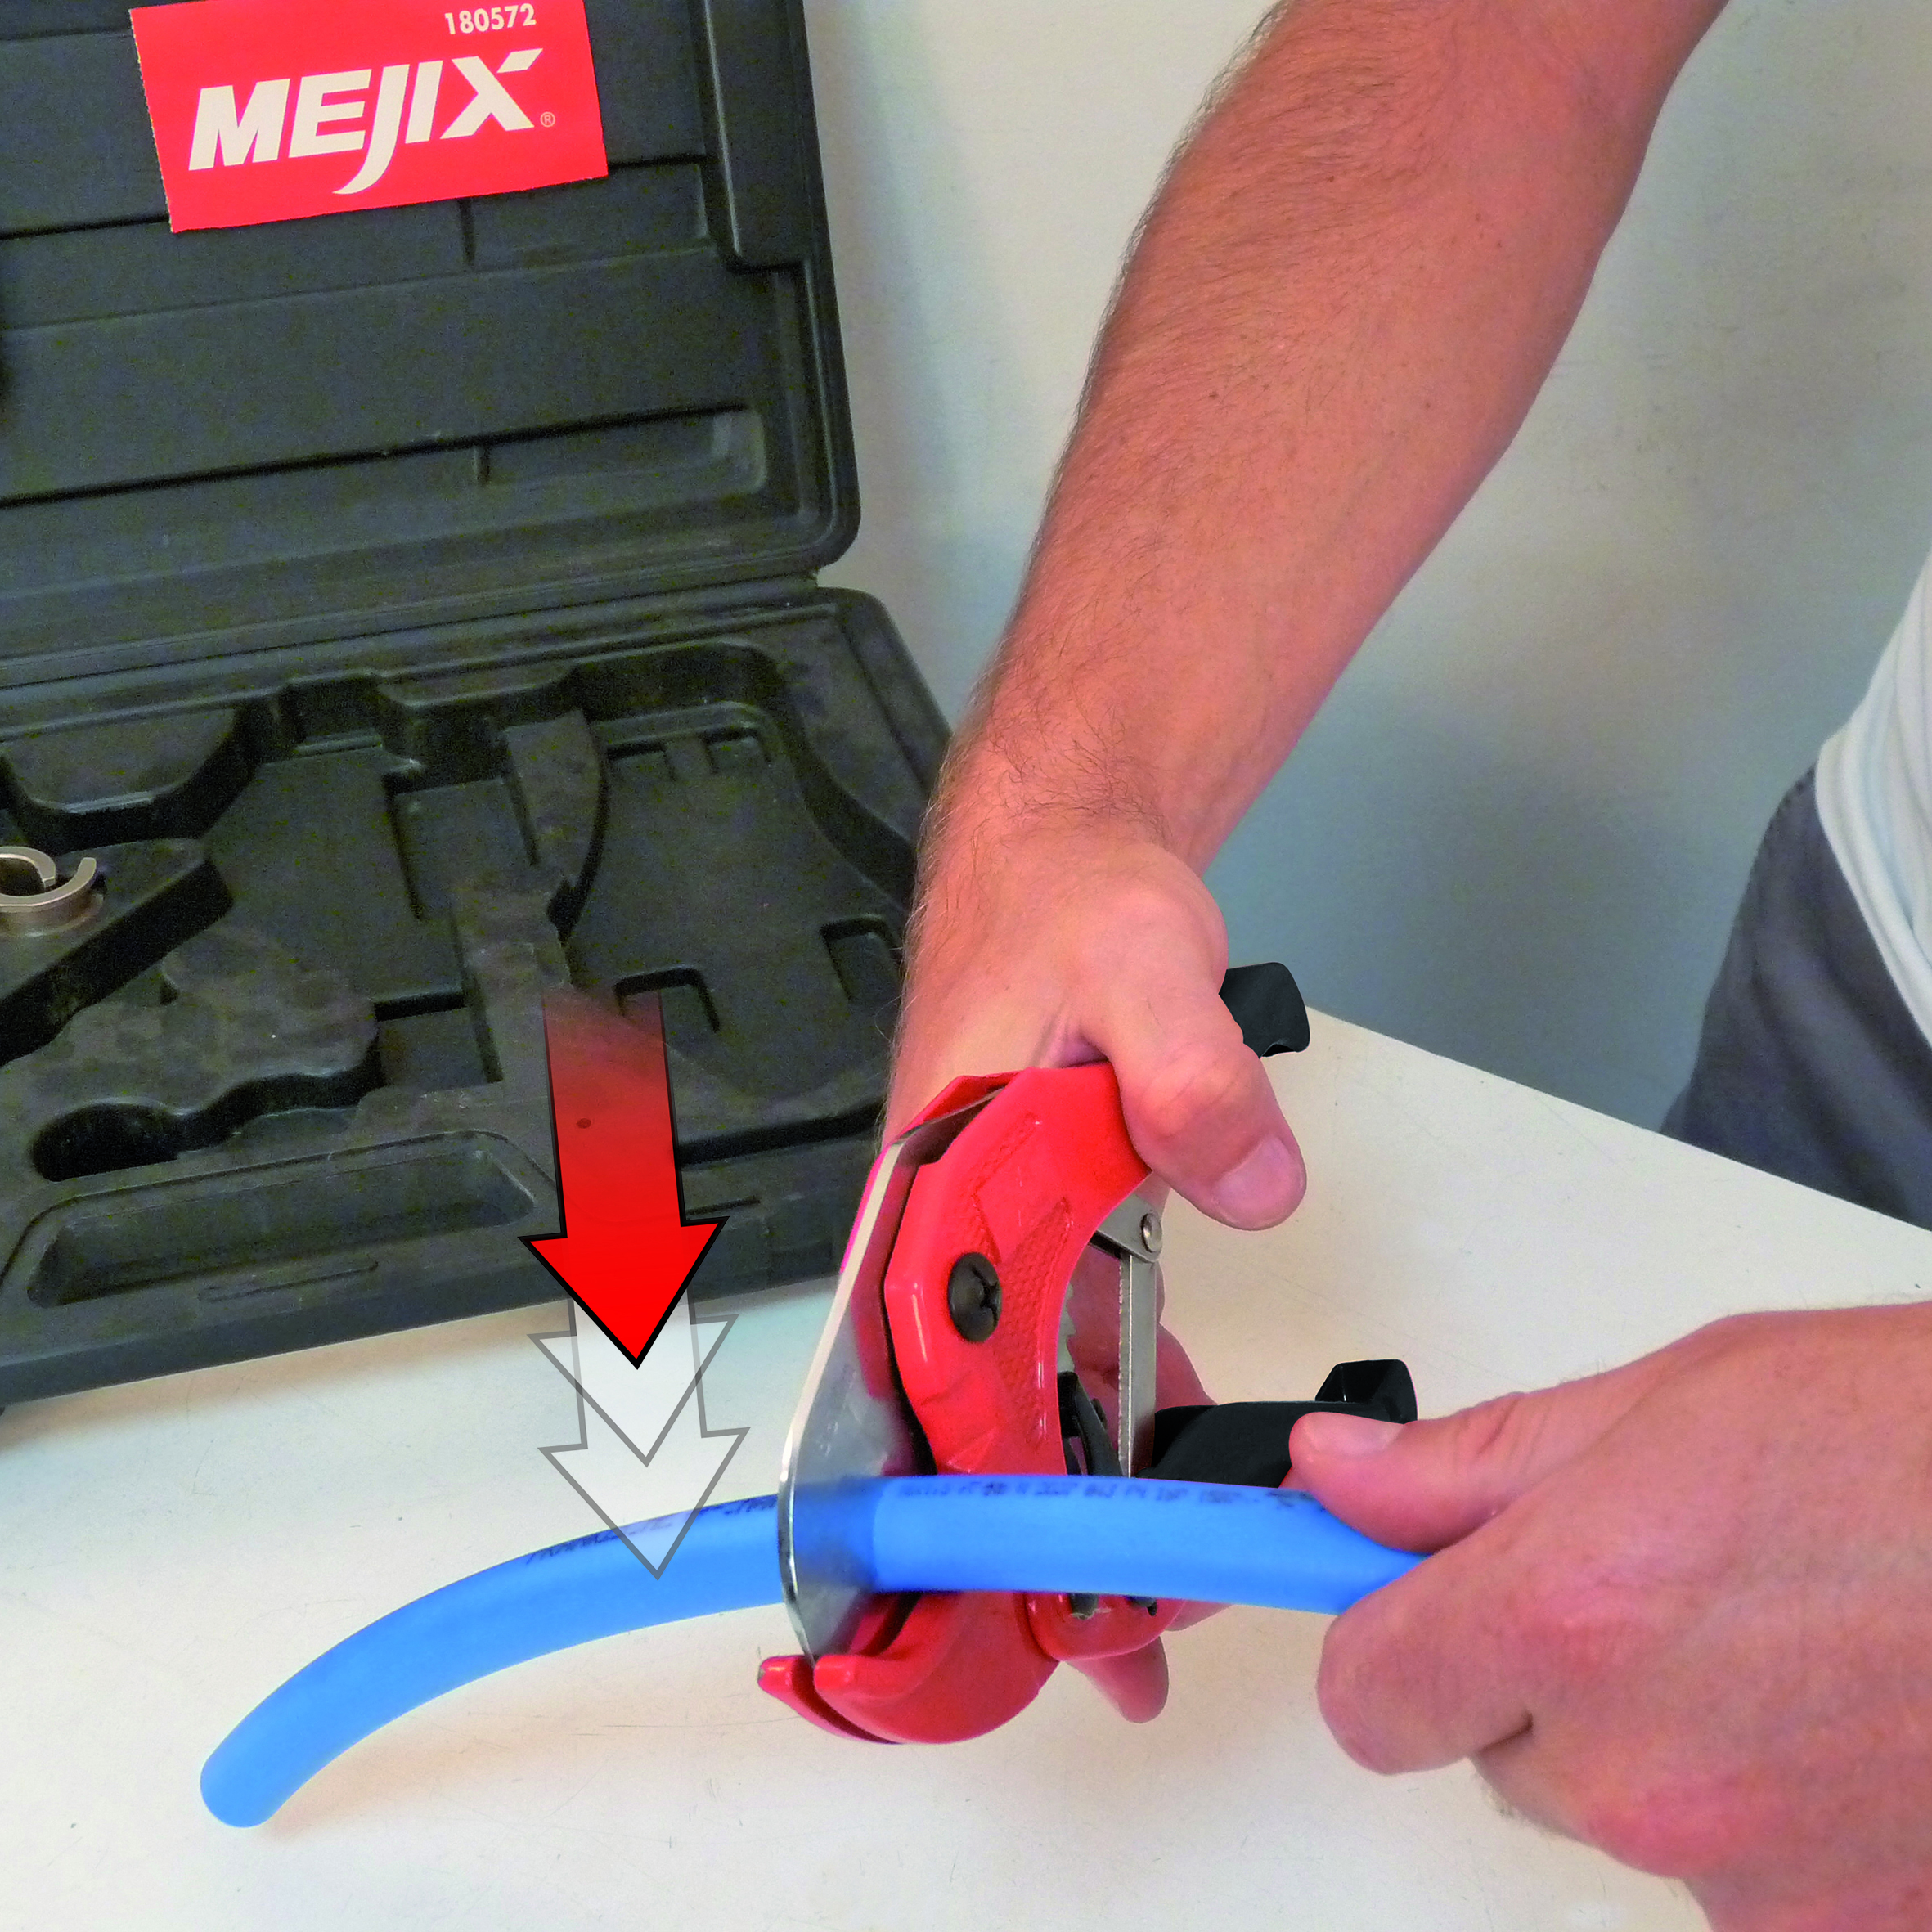
Cutting the PER tube with the 42 mm tube cutter (A) :
The PVC cutting pliers are low effort thanks to the force-transmitting ratchet blade advance. Unlock the clamp by lowering the latch at the end of the sleeves. Open the cutting pliers as far as possible (stop of the rack). Never touch the stainless steel blade with your fingers, risk of injuries. Place the pipe in the rounded part in a semicircle. Fold down the blade by successive pressures until the tube is completely cut. Make sure you are as straight as possible before starting the cut (clamp perpendicular to the tube). If necessary, grind the tube section with a light abrasive (fine grain) or emery cloth.
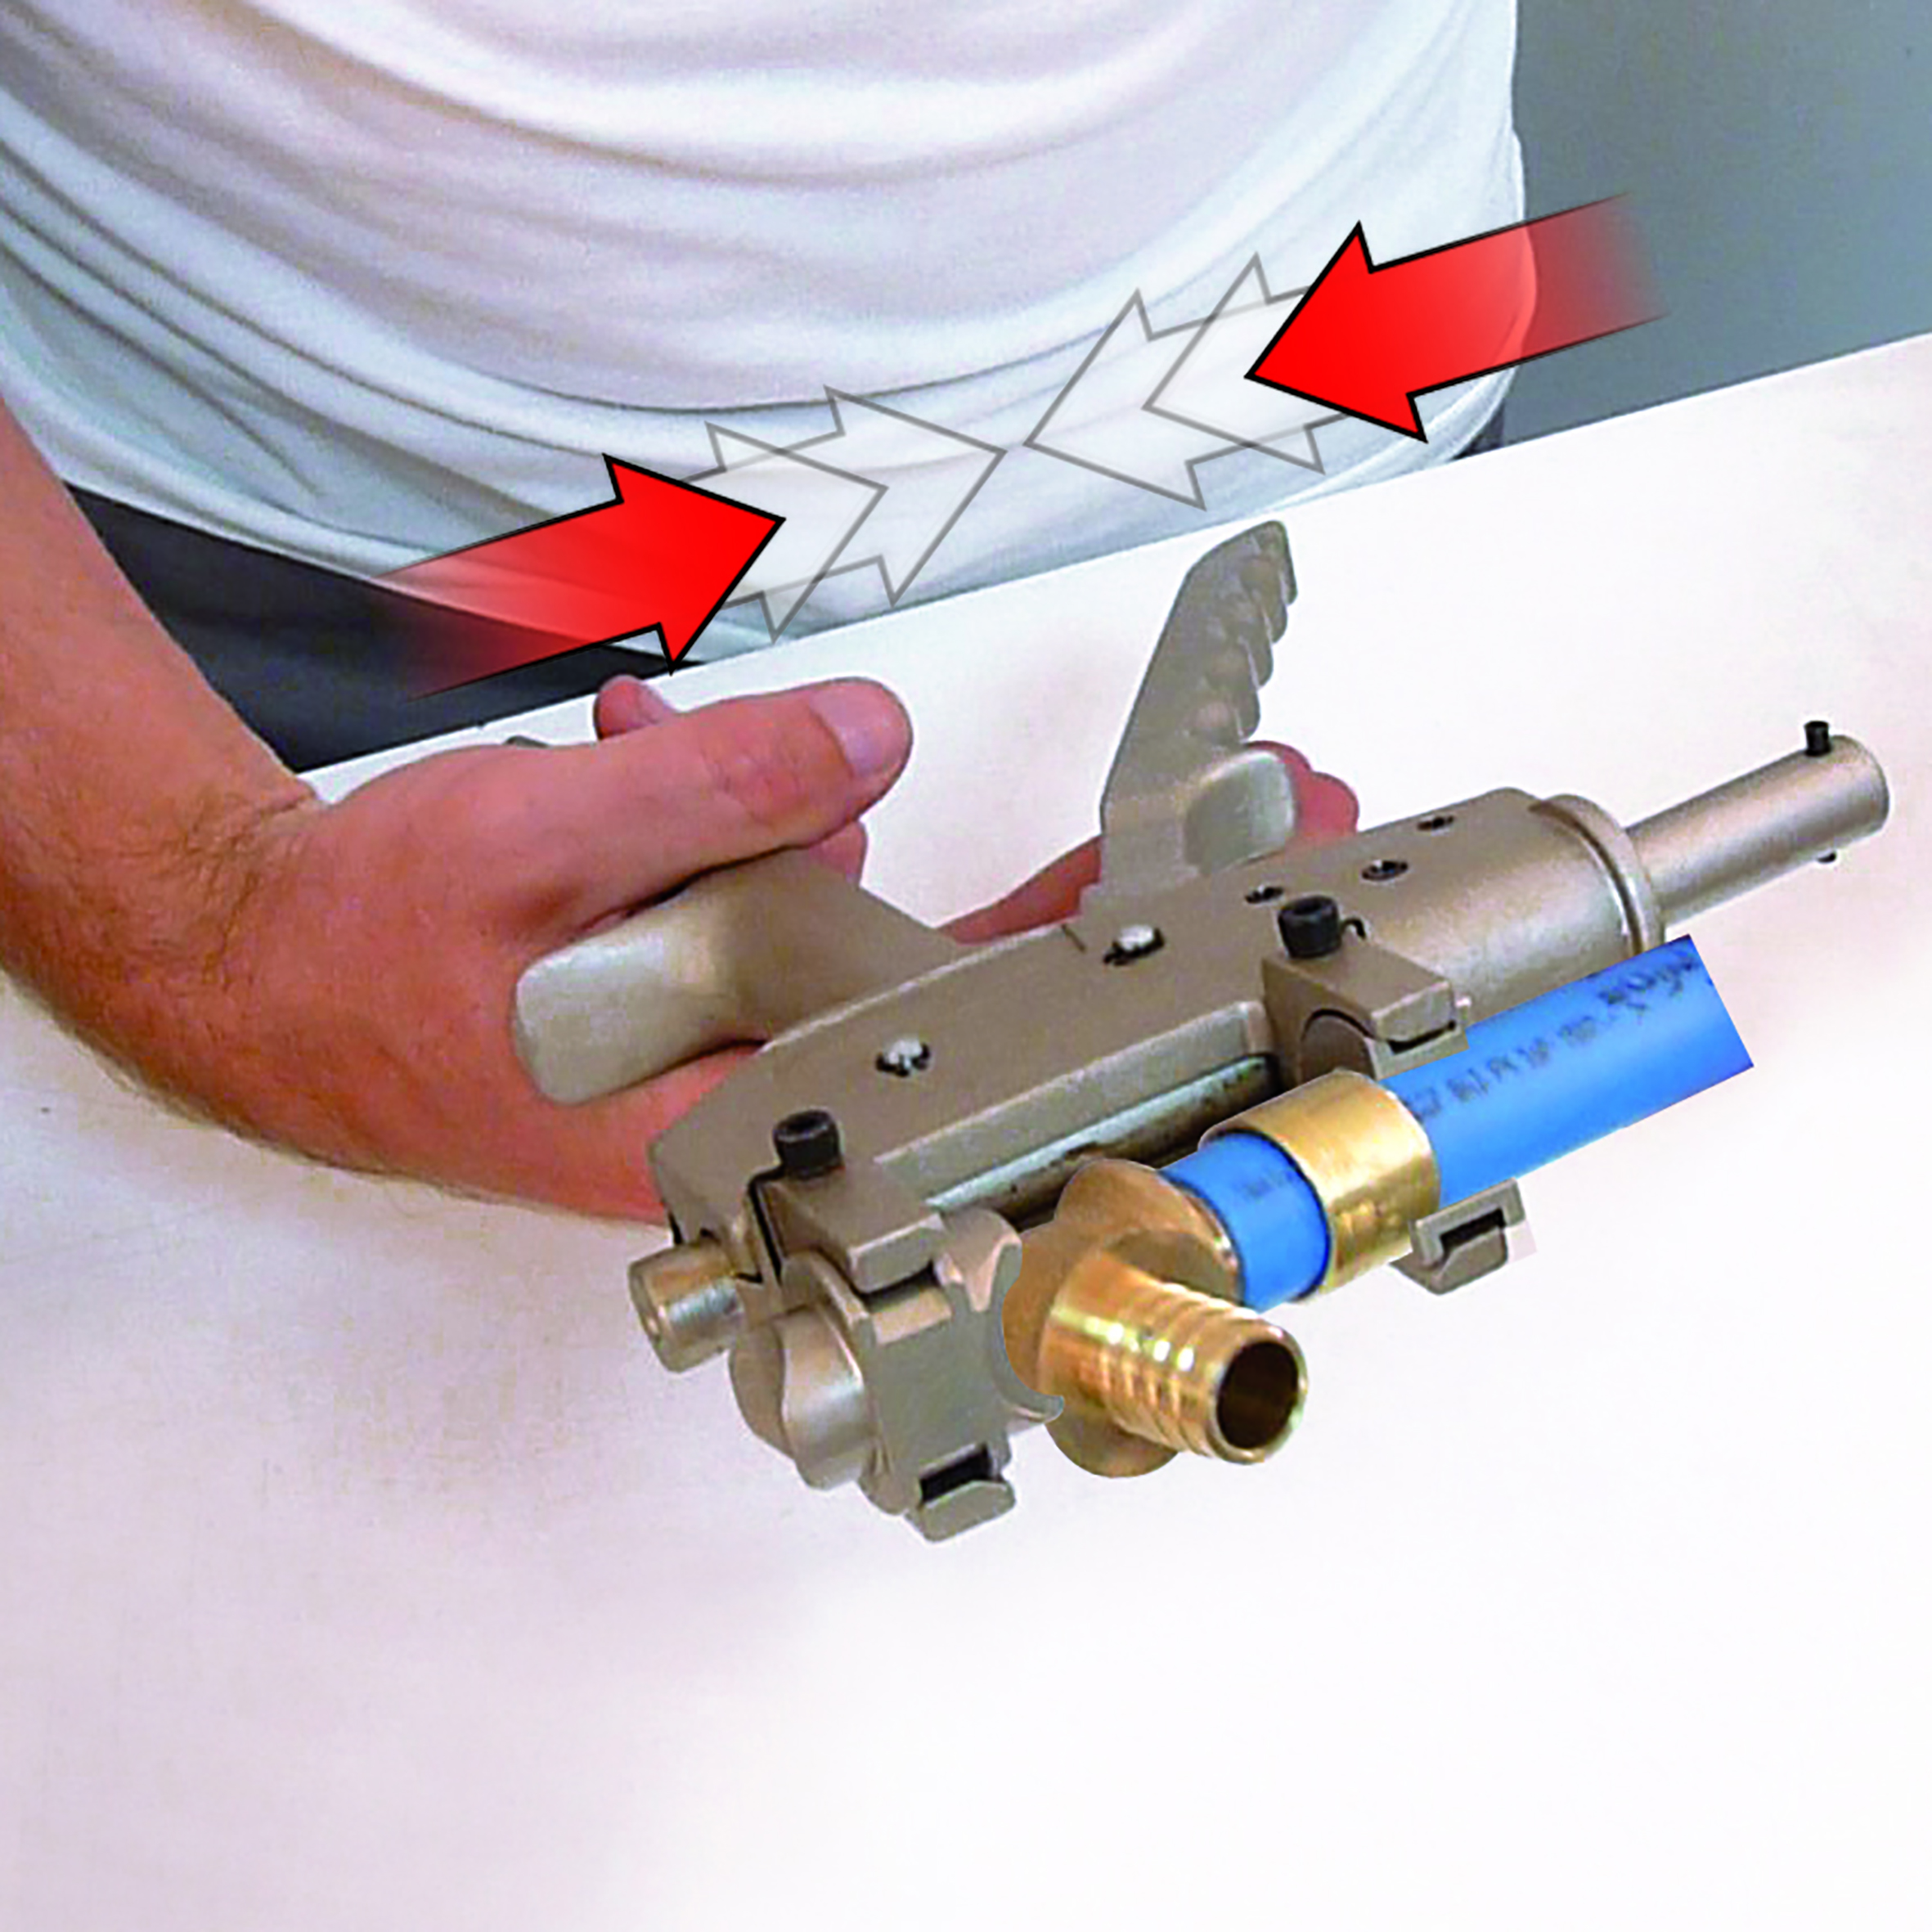
Make your PVC / PER connection:
Among the existing PER tube fittings, the slip fitting is the most efficient in terms of tightness and durability, and the easiest to make. Its installation does not require any special skill but precise assembly and appropriate tools.
Choose the stop according to your type of fitting: E ??= elbow / F = straight or T. Put the selected fittings in position on the sliding clamp C. Position the tube to the stop inside the sliding fitting, by making slide the collar beforehand. Check the positioning of the tube on the small tab (opening) located flush with the fitting, the white of the tube should appear at the base. Using the flaring tool (B), flare the end of the tube: the threaded part must go inside with force. Using the trigger, approach step by step and insert the collar into the screw connection. Complete the connection and fill with water to check the tightness of the assembly.